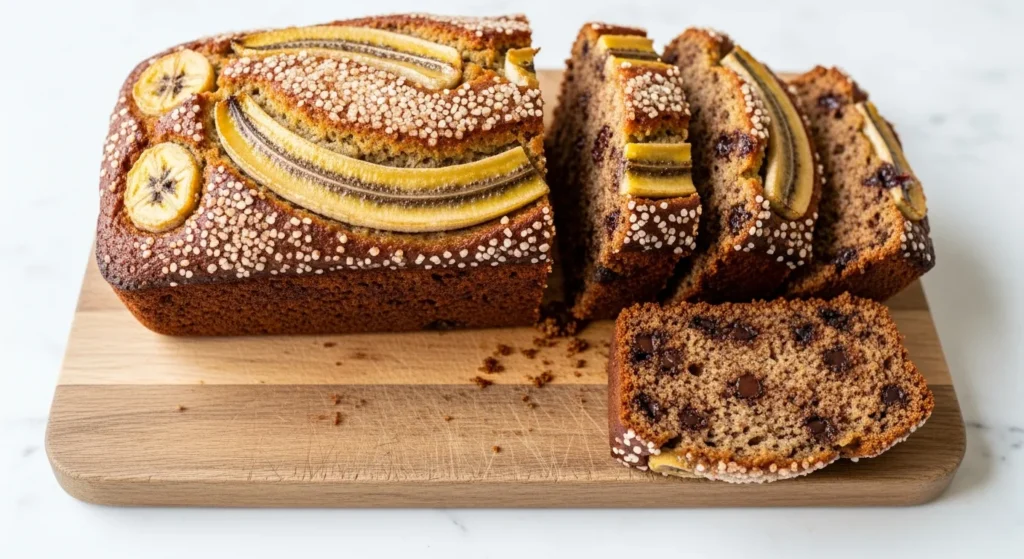
You have reached the end of your search for the ultimate loaf. There is no need to look further because this specific formula delivers a crumb so tender and a flavor so deep that it rivals any professional bakery. Most people struggle with loaves that are either too dry or far too dense. This recipe solves those problems with an efficient method and a focus on moisture retention. We are moving past the basic versions of the past and embracing a modern approach to this kitchen classic.
Table of Contents
Table of Contents
Whether you have a pile of blackened fruit on your counter or you just bought a fresh bunch and want to speed up the process, this guide covers everything. We are talking about a deep golden brown crust and a center that stays soft for days. If you are looking for a more traditional take, you might also enjoy Grandma’s Old Fashioned Banana Bread Recipe for a vintage experience. However, if you want the pinnacle of current baking science, stay right here.
Why This Is The Only Banana Bread Recipe You Need
Efficiency is the core of this method. We do not believe in washing ten different bowls for a simple, quick bread. This is a streamlined process designed for the busy home cook who demands high-quality results without the mess. The texture achieved here is comparable to the World’s Best Banana Bread because we prioritize the ratio of fruit to flour.
The secret lies in the fat content and the state of your fruit. By using melted butter instead of softened butter, we create a more fudge-like consistency that resists drying out. This loaf does not just sit on your counter; it beckons you to cut another slice every time you walk by. It is the perfect balance of sweetness and aromatics.
The Secret to a Moist Crumb
The moisture in this bread does not just come from the fruit. It comes from the careful balance of sugar and fat. Sugar is a liquid ingredient once it hits the oven heat. By using a combination of brown sugar and granulated sugar, we introduce molasses, which attracts moisture from the air. This ensures that even on day three, your bread tastes as fresh as it did ten minutes after cooling.
Selecting the Right Bananas
Stop using yellow bananas. If your fruit has no brown spots, it is not ready for this recipe. The starch in a banana converts to sugar as it ripens. You want bananas that look almost unappealing on the outside. They should be soft, aromatic, and easy to mash into a liquid consistency. If you are in a rush, place the yellow bananas on a baking sheet and bake them at 300 degrees for 15 minutes, until the skins turn black. This liquefies the internal sugars instantly.
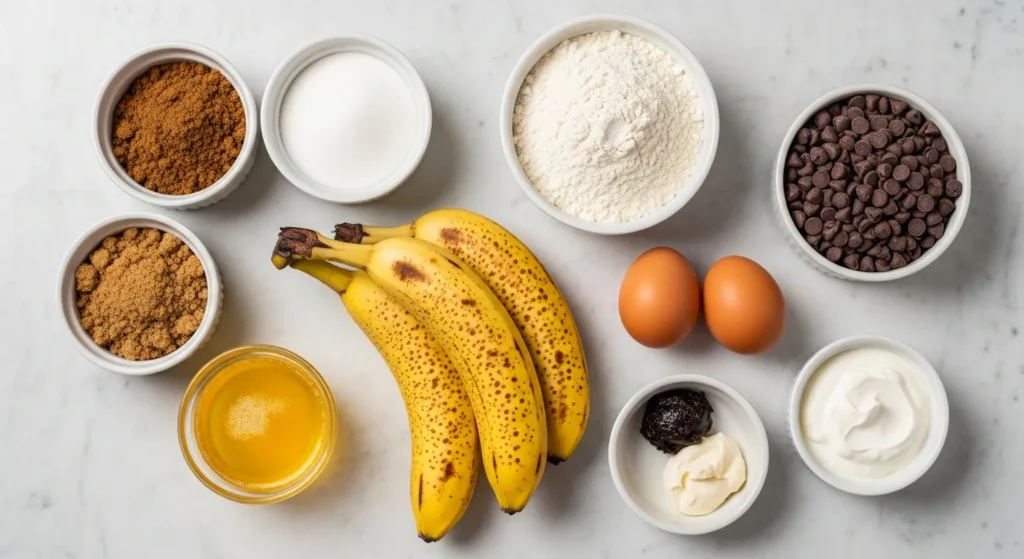
Ingredients Required For Success
- 3 very ripe bananas mashed thoroughly
- 1/2 cup unsalted butter melted and cooled slightly
- 3/4 cup packed light brown sugar
- 1/4 cup granulated white sugar
- 1 large egg at room temperature
- 1 teaspoon pure vanilla extract
- 1 teaspoon baking soda
- 1/2 teaspoon fine sea salt
- 1 1/2 cups all-purpose flour
- 1/2 cup dark chocolate chips or chopped walnuts optional
- 1 tablespoon heavy cream or milk for the optional glaze
- 1/2 cup powdered sugar for the optional glaze
Step By Step Instructions
Step 1: Preheat your oven to three hundred fifty degrees Fahrenheit and grease a nine by five inch loaf pan with butter or nonstick spray.
Step 2: Place your peeled bananas into a large mixing bowl and use a sturdy fork or a potato masher to crush them until no large chunks remain.
Step 3: Pour the melted butter into the banana mash and stir with a wooden spoon or spatula until the fat is fully incorporated.
Step 4: Add the brown sugar, granulated sugar, beaten egg, and vanilla extract to the bowl and whisk vigorously until the mixture looks smooth and glossy.
Step 5: Sprinkle the baking soda and sea salt directly over the wet ingredients and stir well to ensure the leavening agent is distributed evenly throughout the base.
Step 6: Gently fold in the all-purpose flour using a spatula and stop the moment you no longer see white streaks of flour.
Step 7: If you are using mix-ins like chocolate chips or nuts, fold them into the batter with two or three quick strokes.
Step 8: Pour the batter into your prepared loaf pan and smooth the top with your spatula to ensure an even bake.
Step 9: Place the pan on the center rack of your oven and bake for fifty-five to sixty-five minutes or until a wooden skewer inserted into the center comes out clean.
Step 10: Remove the pan from the oven and let it sit on a wire rack for ten minutes before removing the bread from the pan to cool completely.
Step 11: If you desire a glaze, whisk together the powdered sugar and heavy cream in a small bowl and drizzle it over the cooled loaf before slicing.
Professional Tips for a Perfect Rise
To achieve that iconic domed top, you must avoid overworking the batter. When flour meets moisture, gluten begins to develop. Too much mixing creates a tough, bread like texture instead of a cake like crumb. Use a light hand and stop mixing as soon as the flour disappears.
Avoiding the Sunken Center
A loaf that sinks in the middle is usually the result of underbaking or opening the oven door too early. The structure of the bread needs time to set. Do not check the bread until at least fifty minutes have passed. If the top is getting too dark but the center is still wobbly, tent a piece of aluminum foil over the pan to protect the crust while the interior finishes cooking.
Weight vs Volume
For the most consistent results, professional bakers always use a scale. While cup measurements are common, flour can be packed differently depending on how you scoop it. Using one hundred ninety grams of flour will yield the same result every single time, whereas a cup can vary significantly. If you want perfection, invest in a simple digital scale.
Tasty Variations and Mix Ins
This recipe is a versatile canvas. While the base is incredible on its own, you can easily customize it to suit your cravings.
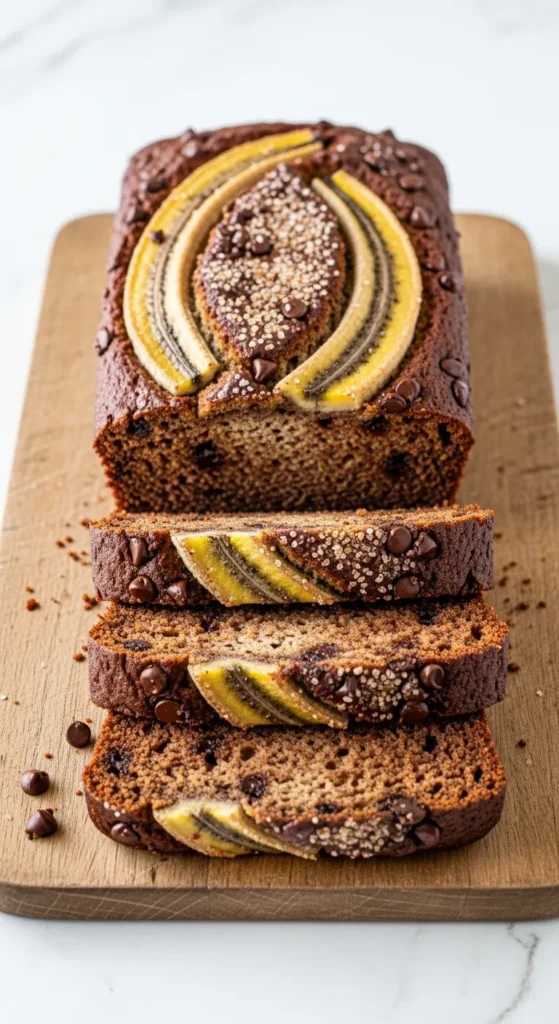
- Dark Chocolate Chip: Adding high quality dark chocolate chips creates pockets of melted cocoa that complement the sweetness of the fruit.
- The Caramelized Banana Garnish: For a stunning visual effect, slice a fresh banana lengthwise and lay the two halves on top of the batter before baking. They will caramelize in the oven heat and create a professional look.
- Spiced Variety: Add one teaspoon of ground cinnamon and half a teaspoon of ground nutmeg to the flour for a warmer, more autumnal flavor profile.
Storage, Freezing, and Reheating Instructions
Proper storage is the difference between a great snack and a wasted loaf. Because this bread is so moist, it can attract mold if left in a warm, humid environment for too long.
- Room Temperature: Wrap the cooled bread tightly in plastic wrap or store it in an airtight container for up to two days.
- Refrigeration: You can store the loaf in the fridge for up to one week. Note that cold temperatures can sometimes firm up the butter, so a quick zap in the microwave is recommended before eating.
- Freezing: This bread freezes beautifully. Wrap individual slices in plastic wrap and then place them in a freezer bag. They will stay fresh for up to three months.
- Reheating: To get that oven fresh taste, toast a slice in a pan with a little bit of butter until the edges are crispy and the center is warm.
Banana Bread FAQ
How do I keep banana bread from getting too dry?
The primary cause of dryness is using too much flour or overbaking. Ensure you measure your flour using the spoon and level method rather than scooping directly with the cup. Also, ensure your bananas are extremely ripe, as they provide the bulk of the moisture.
Can I use frozen bananas for bread?
Yes, frozen bananas are excellent for baking. Thaw them completely in a bowl and be sure to include all the liquid that escapes during the thawing process. That liquid is concentrated sugar and flavor.
Why did my banana bread sink in the middle?
This usually happens if the baking soda is expired or if the bread was removed from the oven too early. It can also happen if you use too many bananas, which makes the batter too heavy for the leavening agent to lift.
How do I make this recipe vegan?
You can substitute the egg with a flax egg (one tablespoon ground flaxseed meal mixed with three tablespoons water) and use melted coconut oil or a vegan butter alternative in place of the dairy butter.
How long does banana bread stay fresh?
When stored in an airtight container at room temperature, it stays fresh for about two days. In the refrigerator, it lasts about a week. For long-term storage, the freezer is your best option.
Print
The Best Moist Banana Bread Recipe Ever
- Total Time: 1 hour 15 minutes
- Yield: 1 loaf 1x
Description
A modern, efficient, and incredibly moist banana bread recipe that uses melted butter and very ripe bananas for a bakery quality result at home.
Ingredients
- 3 very ripe bananas, mashed
- 1/2 cup unsalted butter, melted
- 3/4 cup light brown sugar, packed
- 1/4 cup granulated white sugar
- 1 large egg, room temperature
- 1 teaspoon vanilla extract
- 1 teaspoon baking soda
- 1/2 teaspoon fine sea salt
- 1 1/2 cups all-purpose flour
Instructions
- Preheat your oven to 350 degrees Fahrenheit and grease a 9×5-inch loaf pan.
- Mash the peeled bananas in a large mixing bowl until smooth.
- Stir the melted butter into the mashed bananas.
- Mix in the brown sugar, white sugar, egg, and vanilla extract until smooth.
- Sprinkle baking soda and salt over the mixture and stir to combine.
- Gently fold in the flour until just incorporated, being careful not to overmix.
- Pour the batter into the prepared loaf pan.
- Bake for 55 to 65 minutes or until a tester comes out clean.
- Cool in the pan for 10 minutes before transferring to a wire rack.
Notes
Ensure bananas are heavily spotted for the best flavor. For a quick ripen, bake yellow bananas at 300F for 15 minutes.
- Prep Time: 15 minutes
- Cook Time: 60 minutes
- Category: Breakfast
- Method: Baking
- Cuisine: American
Nutrition
- Serving Size: 1 slice
- Calories: 230
- Sugar: 22g
- Sodium: 180mg
- Fat: 8g
- Carbohydrates: 38g
- Fiber: 2g
- Protein: 3g