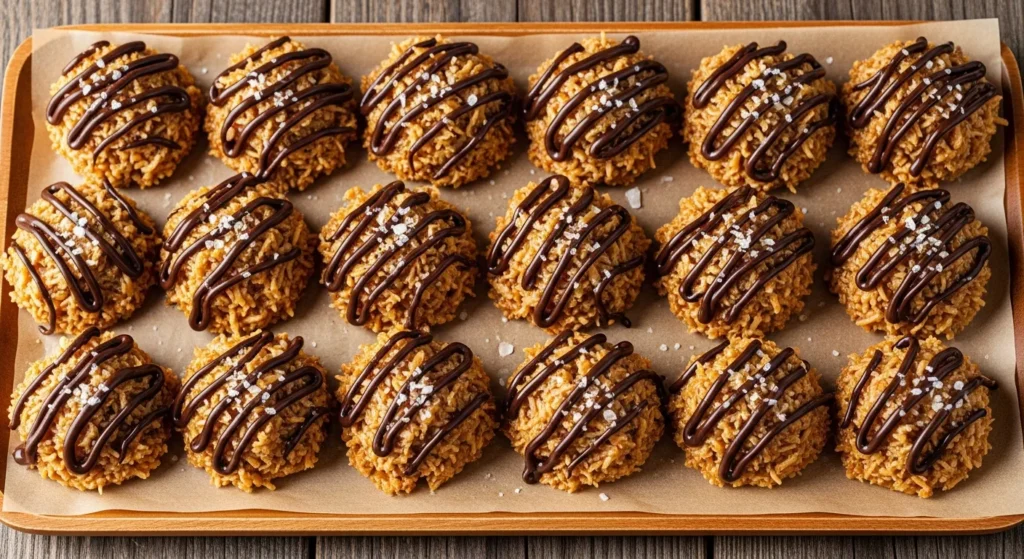
There is a profound sense of nostalgia that arrives every year when those familiar, colorful boxes of cookies appear on doorsteps. Among the most coveted of these treasures is the Samoa: a decadent marriage of shortbread, chewy caramel, and toasted coconut. However, the true artisan knows that the most soulful flavors are born in the home kitchen, where we can elevate a simple snack into a gourmet experience. This recipe for the best no-bake Samoa cookies captures that rustic, handcrafted essence without ever requiring you to strike a match for the oven.
Table of Contents
Table of Contents
In our fast-paced world, finding time for complex baking can be a challenge. Sometimes, we need a reliable, time-saving treat that complements a busy lifestyle, much like an Easy 30-Minute Street Corn Chicken Bowl Recipe does for a Tuesday night. These no-bake cookies offer that same convenience while delivering a rich, complex flavor profile that far surpasses the factory-made original.
As an Amazon Associate, we may earn from qualifying purchases.

Amazon.com
Check price on AmazonWhy You Will Adore This Handcrafted No-Bake Samoa Recipe
What sets this version apart is the dedication to texture and the balance of salt and sugar. By focusing on high-quality ingredients and a few simple stovetop techniques, we create a cookie that feels substantial and authentic. The base is sturdy, the caramel is velvety, and the chocolate provides a crisp, dark contrast to the sweetness of the fruit.
The Nuance Between Samoas and Caramel deLites
For those who follow the seasonal cookie tradition closely, you may have noticed that these treats go by two names. Depending on which licensed bakery supplies your local troop, you are either eating a Samoa or a Caramel deLite. While they share a similar DNA, Samoas are typically known for a heavier coconut coating and a richer, darker caramel. Our recipe leans into the Samoa tradition, emphasizing a deep, amber-hued caramel and a generous portion of toasted coconut flakes that provide a satisfying, toothsome bite.
Essential Components for Authentic Flavor
To achieve a result that tastes like a premium confectionery shop creation, we must start with the right building blocks. While this is a simple process, the quality of your chocolate and the state of your coconut will dictate the final result.
The Virtues of Toasted Coconut
The secret to a truly exceptional Samoa is the golden-brown hue of the coconut. While many Easy No-Bake Samoa Cookies skip the toasting step to save time, we believe the extra five minutes spent over a warm skillet is what provides that rustic, toasted aroma. It transforms the coconut from a simple sweetener into a complex, nutty topping.
Selecting Your Chocolate and Caramel
For the most professional-looking finish, choose high-quality chocolate melting wafers or a chopped dark chocolate bar with at least 60% cacao. The bitterness of the dark chocolate cuts through the sugar of the caramel perfectly. For the binding agent, we utilize a thick, slow-simmered caramel that ensures the cookies hold their shape at room temperature.
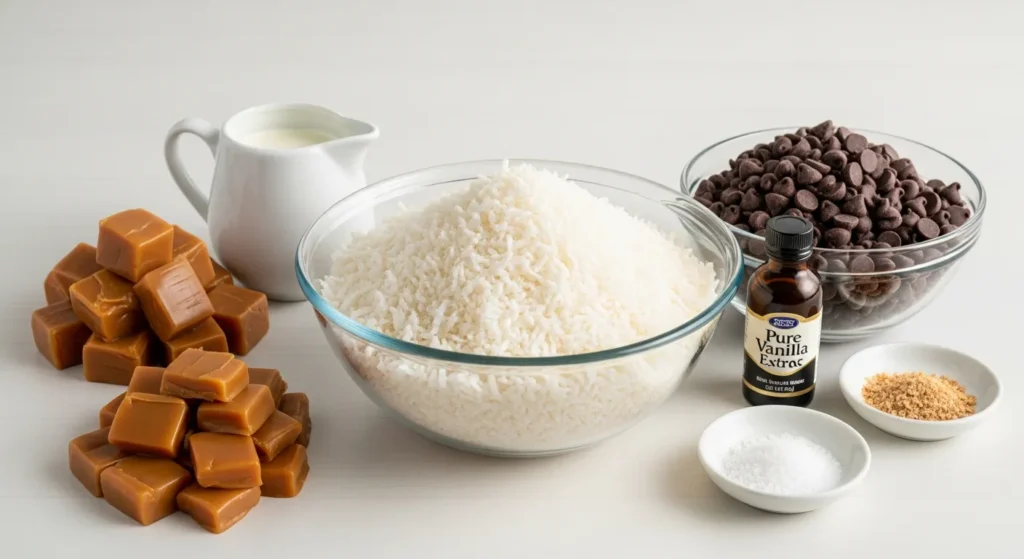
Ingredients for Your No-Bake Masterpiece
Gather these wholesome ingredients to begin your kitchen craft. Each element plays a specific role in creating the layered textures seen in the finest traditional desserts.
- 3 cups sweetened, shredded coconut (for that classic, chewy texture)
- 12 ounces high-quality caramels (wrapped squares or melting bits)
- 2 tablespoons heavy cream (for a silky-smooth caramel consistency)
- 1/4 teaspoon fine sea salt (to enhance the buttery notes)
- 1 1/2 cups semi-sweet or dark chocolate chips or melting wafers
- 1 teaspoon coconut oil (to give the chocolate a glossy, professional sheen)
- Flaky sea salt (for a sophisticated finishing touch)
- 1 teaspoon pure vanilla extract
Handcrafted Step-by-Step Instructions
Follow these detailed steps to assemble your cookies. Because this is a no-bake process, temperature control and timing are your most important tools.
Step 1: Begin by toasting your shredded coconut in a large, dry skillet over medium-low heat. Stir the coconut constantly with a wooden spoon to ensure even browning. Once the flakes reach a beautiful golden-brown color and release a nutty fragrance, immediately remove the skillet from the heat and transfer the coconut to a large mixing bowl to stop the cooking process.
Step 2: In a heavy-bottomed saucepan or a microwave-safe bowl, combine the caramels, heavy cream, and fine sea salt. Melt the mixture slowly, stirring frequently until the caramel is completely smooth and liquid. If using a microwave, work in 30-second intervals to prevent scorching. Stir in the vanilla extract once the mixture is smooth.
Step 3: Pour the warm, melted caramel over the toasted coconut in your mixing bowl. Using a sturdy spatula, fold the ingredients together until every shred of coconut is thoroughly coated in the amber-colored caramel. Allow the mixture to sit for about 5 minutes, so it becomes slightly easier to handle.
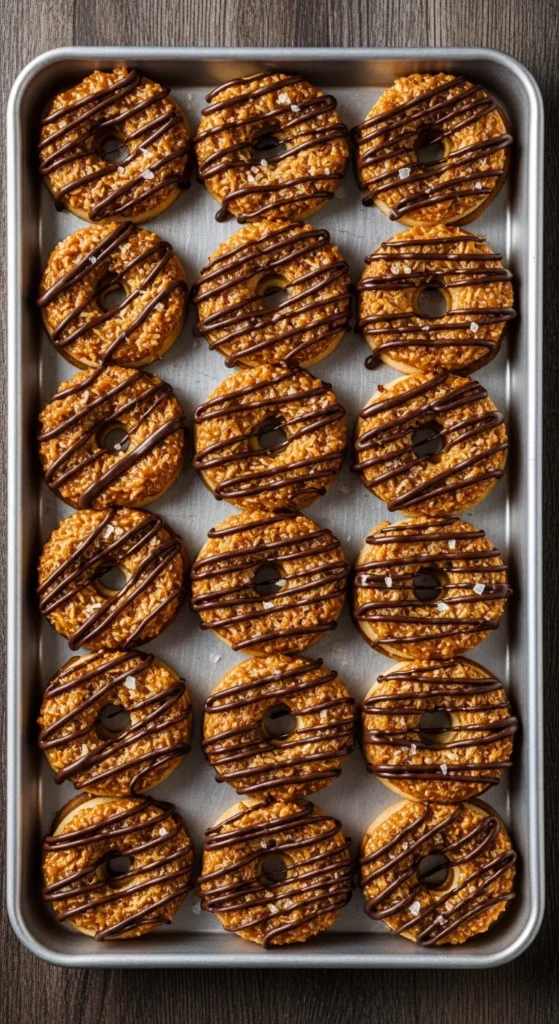
Step 4: Line a large baking sheet with parchment paper or a silicone mat. Using a small cookie scoop or a tablespoon, drop mounds of the coconut mixture onto the prepared sheet. With damp fingers or the back of a spoon, press a small hole into the center of each mound to create the traditional donut-like shape of a Samoa.
Step 5: Place the tray in the refrigerator for at least 20 to 30 minutes. This flash-chill method is essential for ensuring the cookies are firm enough to be dipped in chocolate without falling apart.
Step 6: While the cookies set, melt your chocolate chips and coconut oil together using a double boiler or a microwave at low power. Stir until the chocolate is glossy and completely free of lumps.
Step 7: Remove the chilled cookies from the refrigerator. One by one, dip the bottom of each cookie into the melted chocolate, allowing any excess to drip off before placing it back on the parchment paper. This creates the signature chocolate base.
Step 8: Transfer the remaining melted chocolate into a small piping bag or a plastic storage bag with a tiny corner snipped off. Drizzle the chocolate in thin, decorative lines across the top of each cookie.
Step 9: While the chocolate drizzle is still wet, sprinkle a tiny pinch of flaky sea salt over the top of each cookie. This adds a modern, gourmet flair that elevates the traditional recipe.
Step 10: Allow the cookies to set completely at room temperature or return them to the refrigerator for another 10 minutes for a firm, crisp chocolate snap.
Expert Tips for the Perfect Caramel Drizzle
Achieving that high-gloss, beautiful drizzle seen in professional food photography requires a bit of finesse. The most common mistake is drizzling the chocolate while it is too hot and thin. Let your chocolate cool for a few minutes until it reaches a slightly thicker, ribbon-like consistency. This ensures the lines stay distinct rather than melting into the caramel layer.
Another secret for the perfect finish is the flash-freeze method. By placing your cookies in the freezer for just five minutes before the final drizzle, the cold surface causes the chocolate to set almost instantly upon contact. This prevents the “bleeding” effect where the chocolate runs down the sides of the coconut mounds.
Dietary Substitutions: Making Them Vegan or Gluten-Free
This recipe is naturally gluten-free as long as your caramel and chocolate are processed in a gluten-free facility. To make these vegan-friendly, you can substitute the traditional caramel with a mixture of Medjool date paste and maple syrup and use a dairy-free dark chocolate. For the heavy cream, a splash of full-fat canned coconut milk works beautifully as a plant-based alternative.
Storage and Freezing Instructions
These no-bake wonders are remarkably shelf-stable. You can store them in an airtight container at room temperature for up to five days. However, for the best texture, keep them in the refrigerator, especially during warmer months, to prevent the caramel from becoming too soft.
If you wish to prepare a large batch for future gatherings, these cookies freeze exceptionally well. Place them in a single layer on a tray to freeze solid, then transfer them to a freezer-safe bag. They will maintain their quality for up to three months. Simply thaw them for ten minutes at room temperature before serving.
Frequently Asked Questions
What is the difference between a Samoa and a Caramel deLite? The names differ based on the bakery that produces them for the Girl Scouts. ABC Bakers produces Caramel deLites, which usually have more milk chocolate and a crispier cookie base. Little Brownie Bakers produces Samoas, which feature a darker chocolate, more toasted coconut, and a richer caramel layer. Our recipe mimics the Samoa style.
Why are my no-bake cookies falling apart? This usually happens if the caramel wasn’t melted enough to act as a proper binder or if the coconut-to-caramel ratio is off. Ensure every bit of coconut is sticky with caramel. If they feel loose, chill them for a longer period before dipping them in chocolate.
Can I freeze no-bake Samoa cookies? Yes, they freeze beautifully. Because they contain no eggs or leavening agents, the texture remains consistent after thawing. Just be sure to use an airtight container to prevent freezer burn.
How do I toast coconut without an oven? A wide, heavy skillet is your best tool. Keep the heat on medium-low and move the coconut constantly. It goes from white to burnt very quickly, so stay attentive and remove it from the pan as soon as it turns golden.
What chocolate is best for drizzling? Dark chocolate melting wafers are ideal because they are formulated to set hard and glossy. If using chocolate chips, adding a small amount of coconut oil helps the chocolate flow better for a clean drizzle.
Print
Best No-Bake Samoa Cookies Recipe with Caramel and Coconut
- Total Time: 30 minutes
- Yield: 18 cookies 1x
- Diet: Gluten Free
Description
These no-bake Samoa cookies feature toasted coconut, rich caramel, and dark chocolate for a handcrafted treat without ever turning on the oven.
Ingredients
- 3 cups sweetened shredded coconut
- 12 ounces high
- quality caramels
- 2 tablespoons heavy cream
- 1/4 teaspoon fine sea salt
- 1 1/2 cups semi
- sweet or dark chocolate chips
- 1 teaspoon coconut oil
- Flaky sea salt for topping
- 1 teaspoon pure vanilla extract
Instructions
- Toast shredded coconut in a dry skillet over medium
- low heat until golden brown, stirring constantly. Transfer to a bowl to cool.
- Melt caramels with heavy cream and fine sea salt slowly, stirring until smooth. Stir in vanilla extract.
- Pour melted caramel over toasted coconut and mix until fully coated. Let sit 5 minutes.
- Line a baking sheet with parchment paper. Scoop mounds of mixture and shape into donut
- like cookies with a hole in the center.
- Refrigerate cookies for 20 to 30 minutes until firm.
- Melt chocolate chips with coconut oil until glossy and smooth.
- Dip the bottom of each chilled cookie into melted chocolate and return to parchment.
- Drizzle remaining chocolate over the tops using a piping bag or plastic bag.
- Sprinkle flaky sea salt on top while chocolate is still wet.
- Let cookies set at room temperature or chill again for 10 minutes until chocolate firms.
Notes
Toast coconut carefully to avoid burning for best flavor. Let chocolate cool slightly before drizzling for clean lines. Cookies can be stored at room temperature for 5 days or refrigerated for best texture. Freeze up to 3 months in airtight containers. For vegan version, use date paste and maple syrup instead of caramel and coconut milk instead of cream.
- Prep Time: 20 minutes
- Cook Time: 10 minutes
- Category: Dessert
- Method: No-Bake
- Cuisine: American
Nutrition
- Serving Size: 1 cookie